For your first steps with the Wiki editors and adding images...
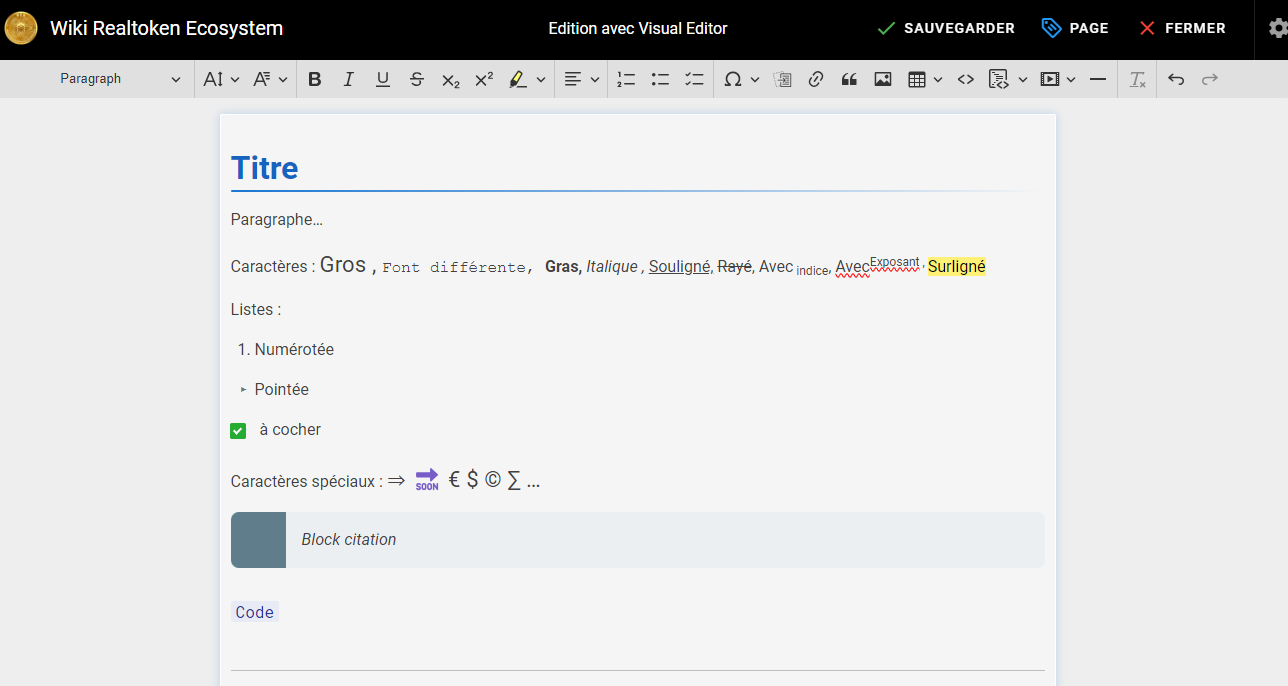
¶ With Visual Editor
A very intuitive solution, where everything is done from the editing bar:
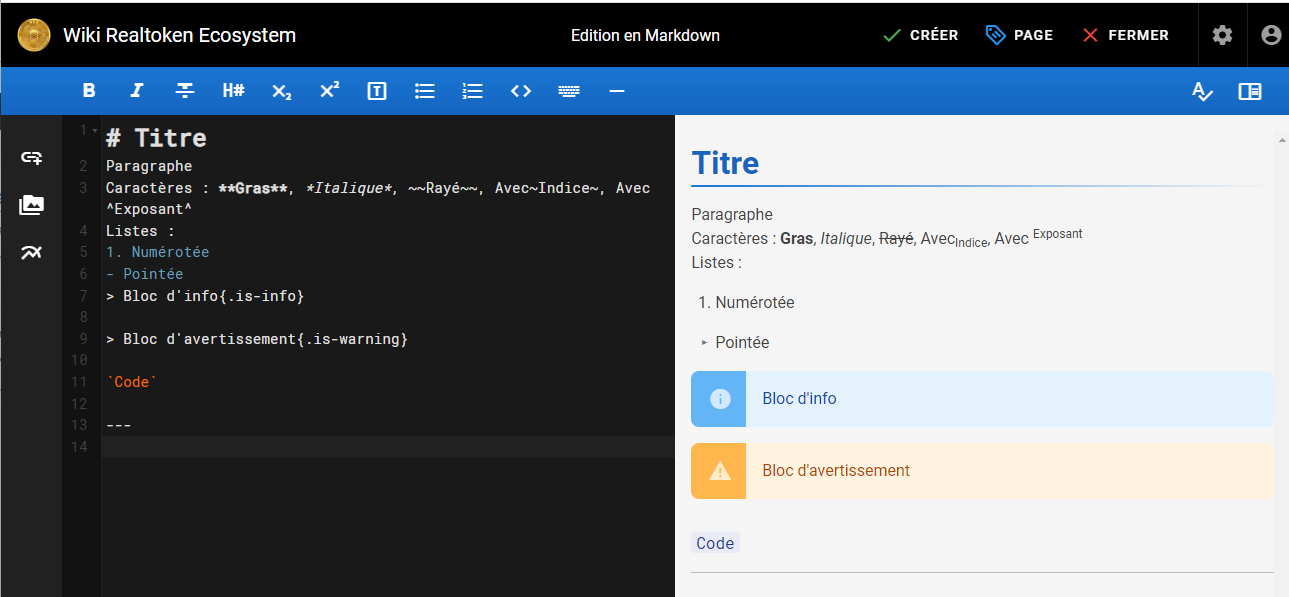
¶ With Markdown
A bit more complex, as you need to know the syntax.
You write on the left side of the screen in markdown format, and the result appears on the right.
You also have an editing bar here to help you with the most common syntaxes.
¶ Adding images
In each of the editors, you have the option to add images (or documents to download).
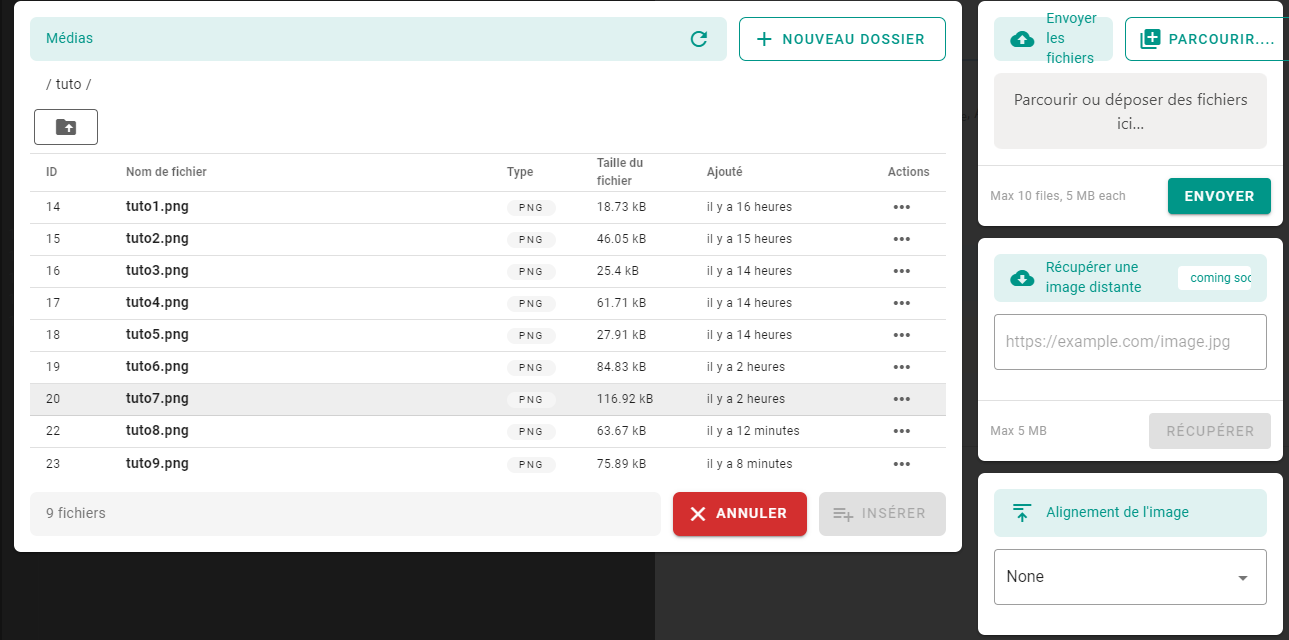
Once you've clicked on the image add icon in your page:
- you will first need to upload your image to a folder:
- choose or create the corresponding folder (in the correct language!),
- at the top right, with "Browse...", find your image in your PC folders,
- then click "Upload", your image will appear in the folder you selected on the left,
- Select your image from the list on the left, Select an alignment mode for your image on the page (bottom right), then click "Insert",
You then return to the editor:
- With Markdown, the following code is inserted into the page (if you chose the center alignment option for the image)
{.align-center}
To resize the image, you'll need to manually add the following tag: for example, to reduce to 75% of the original size
{.img75 .align-center}
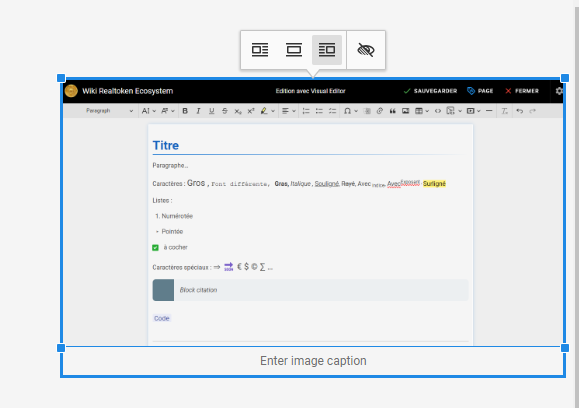
- With Visual Editor, the image appears on the page (where your cursor was when you added it).
By clicking on the image, it's framed in blue, you can then:- resize it by moving one of its corners,
- modify the framing on the page, via the menu that appears at the top.
(except for the centering option which doesn't work)
You can thus insert text next to the image, as you can see in this tutorial.